
I absolutely love making these Candy Cane Marshmallows Recipe during the holiday season because they capture that perfect peppermint sweetness with a fluffy, melt-in-your-mouth texture. There’s something so magical about swirling red candy cane colors right into soft marshmallows that really makes this treat stand out. I’ve found that this recipe is not only delicious but also surprisingly fun to prepare, which is why I always share it with friends and family whenever the festive spirit hits.
Why You'll Love This Candy Cane Marshmallows Recipe
What really draws me to this Candy Cane Marshmallows Recipe is the way the peppermint flavor infuses each bite with a refreshing holiday vibe. The sweetness of the marshmallow base balanced with the cool, crisp taste of peppermint is honestly irresistible. Plus, the little red swirls made from food coloring are not only pretty but give the marshmallows a festive look that instantly brightens any dessert table. I love how this combination awakens childhood nostalgia while still feeling fresh and new.
Another reason I adore this recipe is how straightforward it is. Despite marshmallows seeming complex, the step-by-step method makes it surprisingly accessible, especially if you have a stand mixer. The patience required as you let the gelatin bloom and whip the fluffy marshmallows is well rewarded with soft, pillowy bites that outperform most store-bought options. I also think it’s perfect for any occasion—whether it’s a cozy night by the fire, a holiday party, or a sweet gift for friends. It stands out because it’s homemade, customizable, and totally worth the little bit of effort.
Ingredients You'll Need
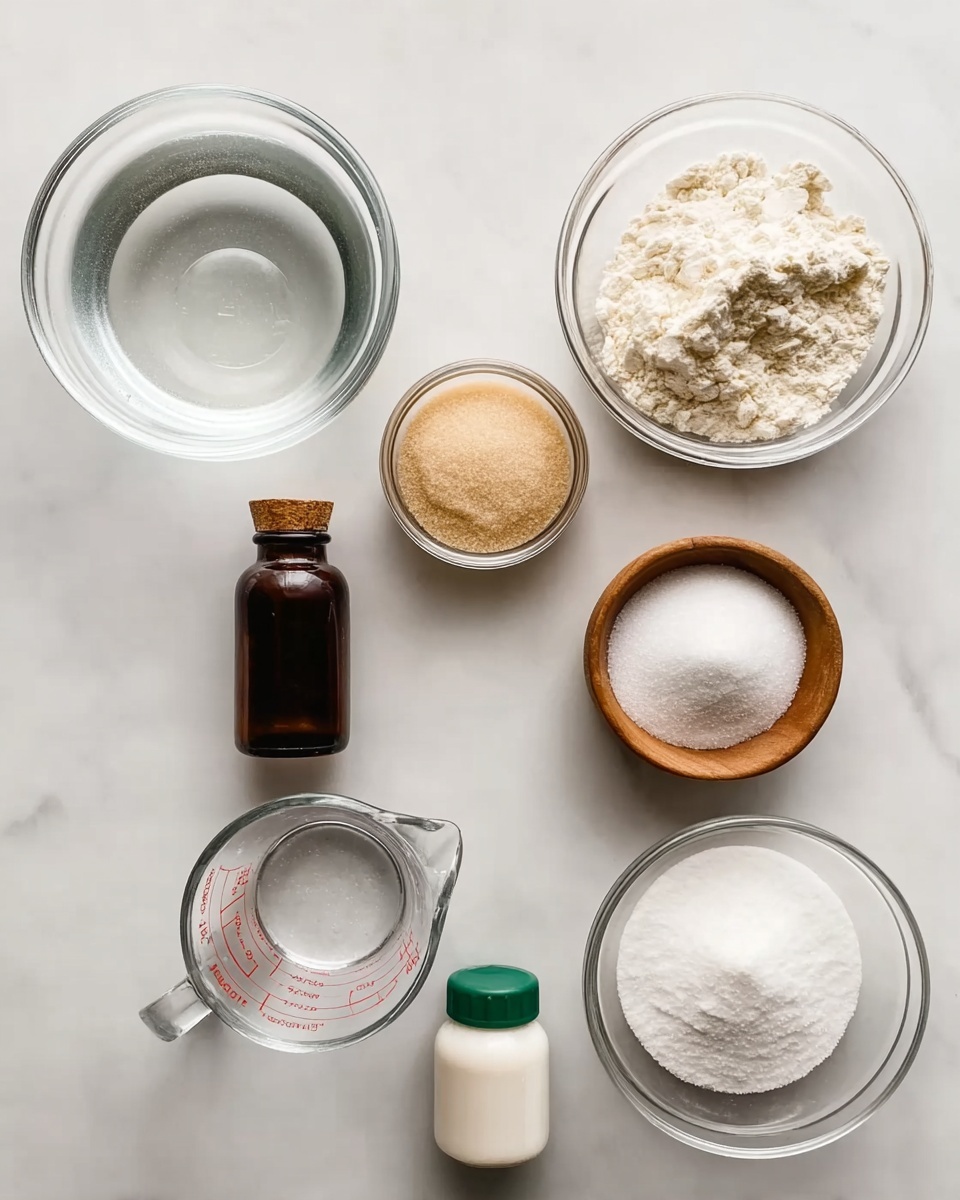
The ingredients for this Candy Cane Marshmallows Recipe are simple but essential to achieving the perfect texture and flavor. Each ingredient plays a distinct role, from gelatin providing the fluff and structure to peppermint extract giving that iconic holiday zing, and red food coloring adding the cheerful candy cane swirls.
- Water: Divided to bloom the gelatin and dissolve the sugar properly for the perfect marshmallow base.
- Powdered gelatin: Gives marshmallows their signature fluffy and stable texture.
- Granulated sugar: Sweetens the marshmallows and helps create that chewy consistency.
- Light corn syrup: Prevents crystallization of sugar ensuring the smooth, glossy mix.
- Peppermint extract: Adds the refreshing and festive flavor essential for candy cane marshmallows.
- Kosher salt: Enhances and balances the overall sweetness and flavor.
- Red food coloring: Creates the iconic peppermint swirl effect for a visually festive look.
- Powdered sugar or cornstarch: For rolling the marshmallows to prevent sticking and add a soft coating.
Directions
Step 1: Start by greasing a 9x9-inch baking pan with cooking spray to prevent the marshmallows from sticking later. Set this aside while you prepare the mixture.
Step 2: In the bowl of a stand mixer, pour in ⅔ cup of cold water and sprinkle the gelatin evenly over it. Let it sit for a few minutes to bloom and soften—this step is crucial for the marshmallows’ perfect texture.
Step 3: Meanwhile, in a medium saucepan over medium-high heat, combine granulated sugar, corn syrup, and the remaining ⅔ cup water. Stir gently until the sugar dissolves. Then, let the mixture come to a boil without stirring, swirling the pan occasionally, and boil until it reaches exactly 240°F on a candy thermometer. This usually takes about 10 to 12 minutes. Once it hits the right temperature, immediately remove it from the heat.
Step 4: With your stand mixer running on low speed, very slowly pour the hot sugar syrup into the gelatin bowl. Add peppermint extract and kosher salt right after to infuse that delightful candy cane flavor.
Step 5: Gradually increase the mixer speed to high and whip the mixture until it becomes stiff, white, and glossy—this usually takes 10 to 12 minutes. You'll know you’re done when stiff peaks form, which slowly fall back into the marshmallow mixture.
Step 6: Quickly pour the marshmallow mixture into your prepared pan and use a spatula to spread it evenly. While still warm, add little drops of red food coloring on the surface then swirl around gently using a toothpick or skewer for that classic candy cane look.
Step 7: Let the marshmallows rest at room temperature and firm up for at least 4 hours. If you’re in a hurry, the refrigerator can speed this along—chill for about 2 hours until set.
Step 8: Dust your work surface generously with powdered sugar or cornstarch, then run a butter knife around the edges of the pan to loosen the marshmallow slab. Flip it out carefully and use a sharp knife—sprayed lightly with cooking spray to prevent sticking—to cut into at least 16 pieces.
Step 9: Roll each marshmallow cube in powdered sugar or cornstarch on all sides to keep them from sticking together. Dab lightly with a paper towel if any excess cooking spray remains, then serve and enjoy!
Servings and Timing
This Candy Cane Marshmallows Recipe yields about 16 delightful pieces, perfect for sharing with family and friends. The prep work takes roughly 15 minutes, but the hot sugar syrup boiling and whipping add another 20 to 25 minutes. The most important time investment is the resting period, which is about 4 hours at room temperature or 2 hours refrigerated to let the marshmallows set properly. Altogether, you’re looking at just under 5 hours total from start to finish, but most of this is hands-off waiting for the magic to happen.
How to Serve This Candy Cane Marshmallows Recipe
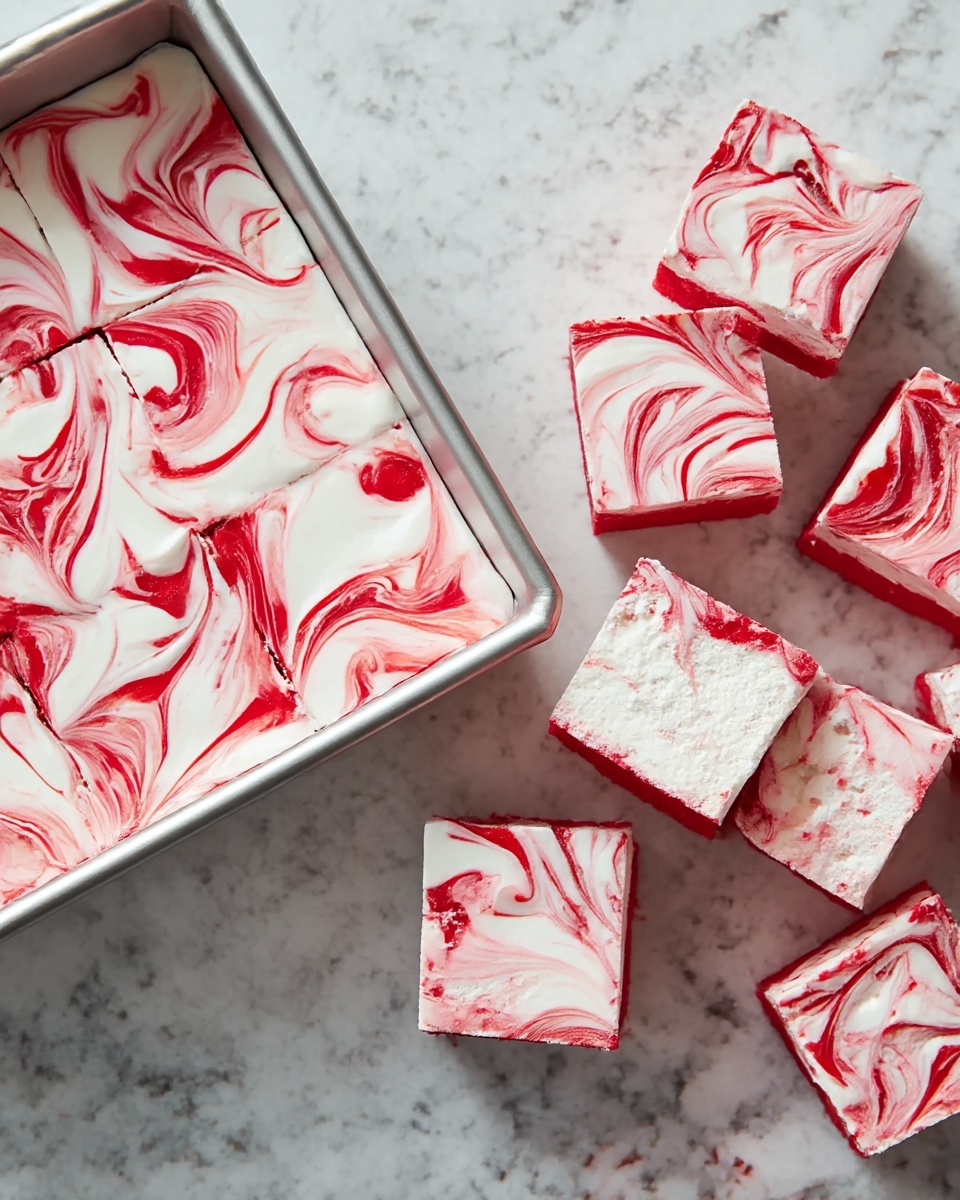
When it comes to serving these Candy Cane Marshmallows, I love to get creative. They’re fantastic as a standalone holiday treat, but they also make an incredible addition to hot chocolate or coffee—watch them gently melt into whipped cream topped festive drinks. You can also skewer them and toast lightly over a flame for a gourmet twist on classic s’mores.
For parties or family gatherings, I like to arrange marshmallows on a festive platter dusted with extra powdered sugar, sprinkled with crushed candy canes, or garnished with fresh mint leaves for a pop of color. Pairing these marshmallows with rich dark chocolate treats or buttery cookies creates a beautiful contrast in taste and texture.
I usually recommend serving them at room temperature to maintain their soft, pillowy structure, but they are also delightful slightly chilled. This makes them perfect for holiday dessert tables, cozy weekend treats, or as a heartfelt homemade gift. Portion-wise, one or two marshmallows per person is usually just right, especially if served alongside other sweets.
Variations
Over time, I’ve found a few great ways to customize this Candy Cane Marshmallows Recipe. For example, if you prefer a different holiday flavor, you can swap peppermint extract for vanilla, almond, or even a hint of cinnamon for a seasonal twist. If you want a more vivid visual, try swirling in green food coloring alongside the red for a classic Christmas theme.
If you need to accommodate dietary restrictions, the recipe can be adjusted. For gluten-free friends, all the ingredients here are naturally gluten-free, which is a huge plus. For vegan marshmallows, you can try using agar agar instead of gelatin, though the texture may vary slightly, so a bit of experimentation could be fun. I’ve also experimented with natural food colorings if you want to avoid artificial dyes.
Another variation I love is to add finely crushed candy canes right on top of the marshmallows before they set for extra crunch and festive flair. As for cooking methods, while this recipe is optimized for stovetop and mixer use, some folks have tried making smaller marshmallows in silicone molds or piping them for decorative flair—both look beautiful and are worth trying out!
Storage and Reheating
Storing Leftovers
Once you have leftovers, the best way to keep your candy cane marshmallows fresh is to store them in an airtight container at room temperature. I like to layer them with parchment paper between so they don’t stick together. Stored this way, they stay soft and delicious for up to 1 week, making them perfect for enjoying throughout the holiday season.
Freezing
If you want to keep your marshmallows longer, freezing works well too. Wrap each piece individually in plastic wrap and place them inside a freezer-safe airtight container or bag. When frozen, they keep for up to 3 months. To thaw, simply leave them at room temperature for a few hours—never microwave frozen marshmallows as this can ruin the texture.
Reheating
If your marshmallows become a little stale or lose some softness, you can briefly warm them by placing them in a microwave-safe dish and microwaving in 5 to 10 second bursts. Be careful not to overheat because they can melt too quickly. Another trick I use is to place marshmallows near a warm drink or inside a gently warmed oven (around 150°F) for just a few minutes to restore softness without melting.
FAQs
Can I make this Candy Cane Marshmallows Recipe without a stand mixer?
While a stand mixer makes whipping marshmallows incredibly easy and hands-free, you can technically whisk by hand—but be prepared for a serious arm workout! A handheld electric mixer is also a good alternative and will save you some effort.
Is it okay to use imitation peppermint extract?
For the best bright and fresh peppermint flavor, I always recommend using high-quality pure peppermint extract. Imitation versions may taste artificial or less vibrant, which could affect the final taste of your marshmallows.
How can I tell when the sugar syrup has reached the right temperature?
Using a reliable candy thermometer is key. You want to hit the "soft ball" stage at 240°F exactly. This ensures the sugar concentration is perfect for creating that chewy marshmallow texture without being too soft or hard.
Can I skip the food coloring? Will it affect taste or texture?
Absolutely! The red food coloring is purely decorative and doesn’t affect flavor or texture, so feel free to omit it if you prefer plain white marshmallows or want to experiment with different colors.
What’s the best way to cut sticky marshmallows cleanly?
Spraying your knife with a little cooking spray before cutting makes slicing so much easier and cleaner. Also, dusting the marshmallows with powdered sugar or cornstarch before cutting prevents sticking and helps the pieces hold their shape perfectly.
Conclusion
Making this Candy Cane Marshmallows Recipe has become one of my favorite holiday traditions because it’s fun, festive, and irresistibly delicious. I hope you’ll give it a try and enjoy the magic of homemade marshmallows infused with peppermint goodness. Trust me, once you taste these soft, beautifully swirled treats, you’ll want to make them for every special occasion—and I can’t wait to hear how you like them!
PrintCandy Cane Marshmallows Recipe

These Candy Cane Marshmallows are a festive homemade treat perfect for the holiday season. Flavored with refreshing peppermint extract and swirled with red food coloring, they bring the classic candy cane flavor into a fluffy, soft marshmallow. Making them from scratch allows you to enjoy fresh, flavorful marshmallows without any preservatives or artificial textures.
- Prep Time: 20 minutes
- Cook Time: 12 minutes
- Total Time: 4 hours 32 minutes
- Yield: 16 servings
- Category: Dessert
- Method: Stovetop
- Cuisine: American
Ingredients
Gelatin Base
- 1 ⅓ cups water (divided)
- 3 envelopes unflavored, powdered gelatin (about 7 ½ teaspoons)
Syrup Mixture
- 1 ½ cups granulated sugar
- 1 cup light corn syrup
- ¼ teaspoon kosher salt
Flavoring & Coloring
- 1 teaspoon peppermint extract
- 1-2 teaspoons red food coloring
For Rolling
- ⅓ cup powdered sugar or cornstarch
- Cooking spray (for greasing pan and knife)
Instructions
- Prepare the Pan: Grease a 9x9-inch baking pan thoroughly with cooking spray and set aside to prevent sticking.
- Bloom Gelatin: In the bowl of a stand mixer, combine ⅔ cup cold water and sprinkle the gelatin evenly over the surface. Let it soak and bloom for a few minutes until gelatin absorbs the water.
- Cook Sugar Syrup: In a medium saucepan over medium-high heat, mix granulated sugar, light corn syrup, and remaining ⅔ cup water. Stir until sugar dissolves completely. Bring the mixture to a boil and let it cook, swirling occasionally, until it reaches 240°F on a candy thermometer (soft-ball stage), about 10-12 minutes. Immediately remove from heat.
- Combine Syrup with Gelatin: With the stand mixer running on low speed, carefully and slowly pour the hot sugar syrup into the bloomed gelatin mixture. Add peppermint extract and kosher salt.
- Whip the Mixture: Gradually increase mixer speed to high and whip until the mixture becomes thick, white, and forms stiff peaks—this will take about 10-12 minutes. Peaks should hold their shape but fall back slowly when the whisk is removed.
- Add the Candy Cane Swirl: Quickly pour the whipped marshmallow mixture into the prepared pan and spread evenly with a spatula. While still warm, dot the top with red food coloring using droplets. Use a toothpick or skewer to gently swirl the color through the marshmallow for a candy cane effect.
- Set the Marshmallows: Allow the marshmallows to firm up by letting them sit at room temperature for at least 4 hours, or refrigerate for 2 hours.
- Cut and Coat: Dust your work surface with powdered sugar or cornstarch. Loosen the edges of the marshmallow slab with a butter knife, then invert it onto the surface. Cut into at least 16 pieces with a greased sharp knife to prevent sticking. Roll each marshmallow piece in powdered sugar or cornstarch, coating all sides thoroughly.
- Serve and Store: Serve immediately or store in an airtight container at room temperature to keep fresh.
Notes
- Use a candy thermometer for accurate temperature to ensure proper marshmallow texture.
- Make sure to grease your knife before slicing to prevent sticking.
- Marshmallows can be stored in an airtight container for up to 2 weeks at room temperature.
- Adjust red food coloring amount based on desired intensity of the swirl.
- For a thicker peppermint flavor, you may add up to 1 ½ teaspoons of peppermint extract, but be cautious as too much can be overpowering.



Leave a Reply