
I have always loved making desserts that feel like a celebration on a plate, and this Holiday Pavlova Wreath Recipe is one of my absolute favorites to share during the festive season. The crisp and delicate meringue base, topped with luscious whipped cream and a vibrant burst of fresh fruit, comes together into a stunning wreath shape that brings joy to any holiday table. Every time I make it, I’m reminded of how magically simple ingredients can transform into something so beautifully impressive and delicious.
Why You'll Love This Holiday Pavlova Wreath Recipe
What I adore most about this Holiday Pavlova Wreath Recipe is the incredible balance of textures and flavors. The meringue has this crispy, melt-in-your-mouth exterior with a soft, marshmallow-like center that pairs perfectly with the lightness of whipped cream and the natural sweetness of the fruit topping. The bright bursts of seasonal fruit elevate the entire dessert, making every bite refreshingly delightful. I always feel like this recipe is the perfect sweet note to end any festive meal.
Also, I find this recipe wonderfully approachable, even if pavlovas seem intimidating at first. The steps are straightforward, and with just a bit of patience during baking and drying, you get a stunning wreath that looks like it took hours to create. It’s an incredibly festive centerpiece for holiday gatherings, Christmas dinners, or even New Year’s parties. The wreath shape adds such a beautiful seasonal touch that always gets compliments and makes guests feel special.
Ingredients You'll Need
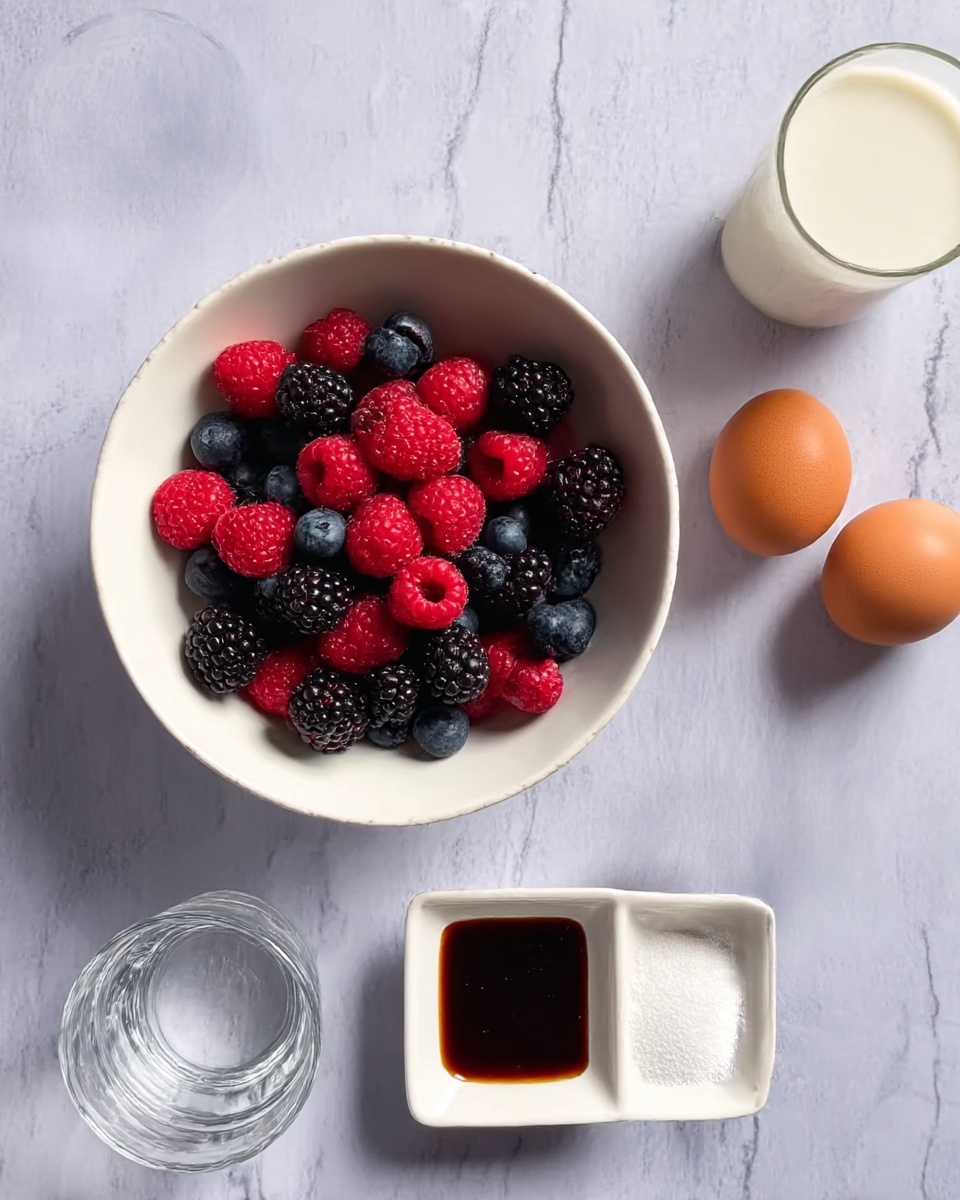
The ingredients for this Holiday Pavlova Wreath Recipe are surprisingly simple but so essential for achieving the perfect combination of flavor, texture, and color. Each element plays an important role—from the egg whites that create that fluffy yet crisp meringue, to the fresh fruit that adds juicy bursts of flavor and a pop of holiday color.
- Egg whites: Six large egg whites whipped to soft peaks form the light base of the pavlova.
- Caster sugar: Adds sweetness and helps achieve that glossy, stiff meringue structure.
- White wine vinegar: Helps stabilize the meringue and keeps it from collapsing.
- Cornflour: Gives the inside of the pavlova a marshmallow-like softness.
- Double cream: Whipped to soft peaks, it adds richness without overpowering the other flavors.
- Vanilla bean paste: Adds warm, natural vanilla flavor that elevates the cream.
- Fruit of your choice: Fresh, seasonal fruit adds vibrant color and a fresh burst of flavor on top.
- Mint leaves: Provide a pop of green and a subtle hint of freshness as a garnish.
- Icing sugar: A light dusting finishes the wreath beautifully with a snowy effect.
Directions
Step 1: Preheat your oven to 160˚C (fan 140˚C/320˚F/gas 3) to prepare the perfect baking environment for the meringue.
Step 2: Line a baking sheet with parchment paper and carefully draw a 30cm circle on it. Then draw a smaller 15cm circle in the center—this will help guide you in shaping the wreath.
Step 3: Place the egg whites in a large mixing bowl and whisk using a stand or electric mixer until soft peaks form. I find it easiest to start on low speed and gradually increase as the whites begin to froth.
Step 4: Slowly add the caster sugar a little at a time, whisking continuously on high speed until the meringue is stiff and glossy—this is the key to a perfect pavlova texture.
Step 5: Make a slurry by mixing the cornflour and white wine vinegar in a small cup, then gently fold this into the meringue mixture, ensuring not to deflate the fluffiness.
Step 6: Spoon the meringue onto the larger circle drawn on your parchment, shaping it into a ring while keeping the center hole clear.
Step 7: Carefully flatten the meringue so there’s a slight well on top to hold the cream and fruit later, remembering the meringue will puff up a bit in the oven.
Step 8: Place the baking tray in the oven and immediately lower the temperature to 140˚C (fan 120˚C/280˚F/gas 1). Bake for 1 hour to 1 hour and 15 minutes until it’s crisp on the outside. For extra dryness, you can leave it in the turned-off oven overnight but make sure it rests at least one hour before adding toppings.
Step 9: While the pavlova bakes, whip the double cream with the vanilla bean paste until it forms soft peaks that just hold their shape when you lift the whisk.
Step 10: Once your pavlova wreath has cooled, spoon the whipped cream generously onto the center opening and arrange your chosen fresh fruit beautifully on top.
Step 11: Finish by decorating with fresh mint leaves and a delicate dusting of icing sugar, giving it that festive snow-kissed look that makes the dish so special.
Servings and Timing
This Holiday Pavlova Wreath Recipe makes approximately 16 generous servings—a perfect size for family gatherings or holiday parties. You’ll spend about 30 minutes on prep, around 1 hour to 1 hour and 15 minutes baking, plus at least 1 hour resting time to ensure the pavlova is properly dried and crisp before adding toppings. This means from start to finish, you should allow about an hour and a half to two hours before serving, but most of that is hands-off baking and resting time.
How to Serve This Holiday Pavlova Wreath Recipe
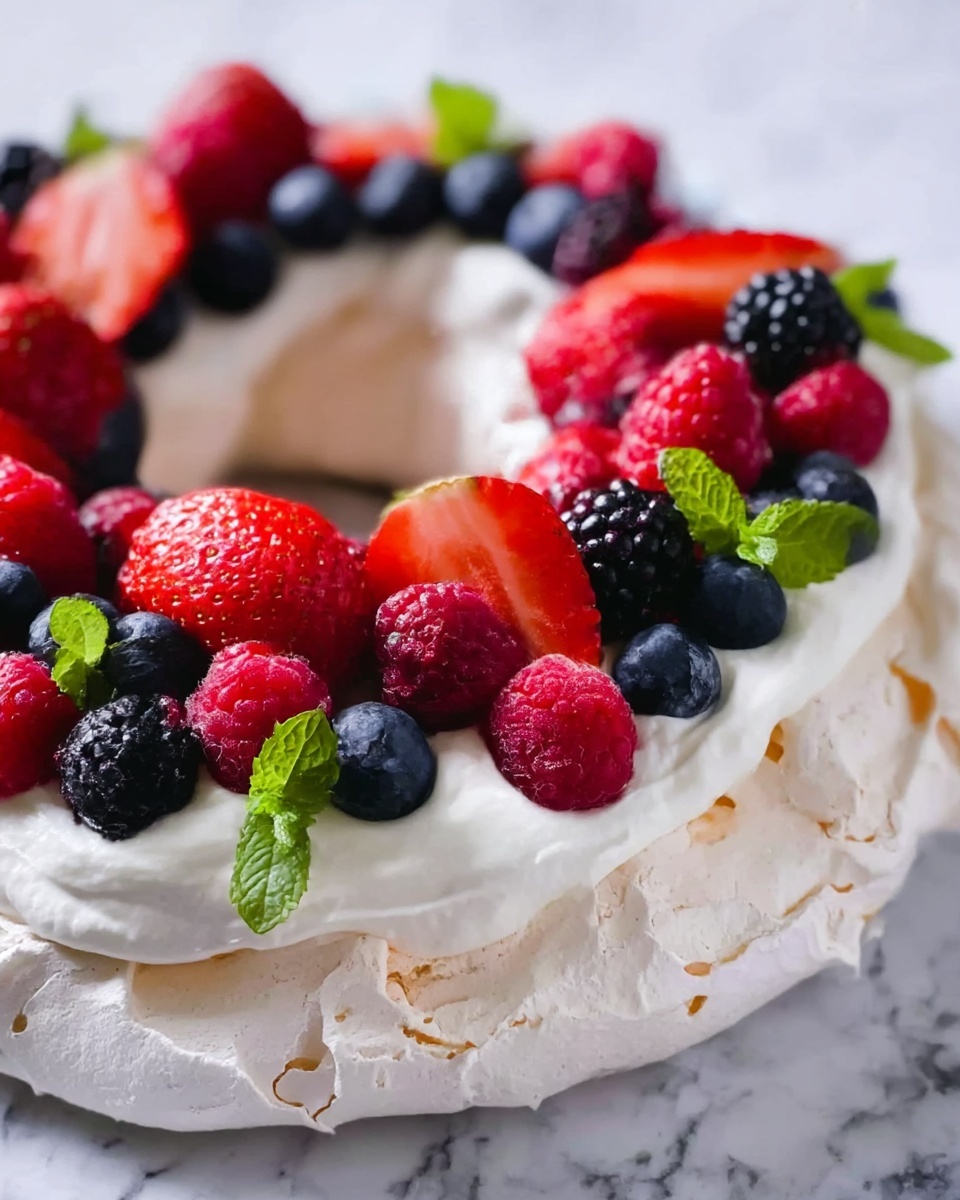
When I serve this Holiday Pavlova Wreath Recipe, I love to keep things fresh and vibrant, embracing the natural sweetness of the fruit and the rich creaminess of the whipped topping. Slicing it into generous wedges, I often suggest pairing it with a light fruit coulis or a drizzle of honey to add another layer of flavor without overpowering the delicate meringue. For some extra texture, a sprinkling of toasted nuts like pistachios or finely chopped almonds adds a lovely crunch that guests appreciate.
Presentation is key with this wreath, so I always arrange it on a large, flat serving plate that showcases the circular shape and vibrant fruit. Garnishing with fresh mint leaves and a delicate dusting of icing sugar really elevates the look, making it feel festive and elegant. It’s perfect for a holiday table centerpiece where it can be admired before everyone eagerly digs in.
For drinks, I usually pair the pavlova with something light and bubbly like a Prosecco or Champagne, which beautifully balances the sweetness of the dessert. Non-alcoholic options like sparkling water with a splash of cranberry juice or a minty iced tea also complement the flavors wonderfully. I recommend serving the pavlova chilled or at room temperature to let the cream stay light and luscious while the meringue remains crisp.
Variations
One of the best things about this Holiday Pavlova Wreath Recipe is how versatile it is. If you want to switch things up, try using different fruits depending on what’s in season or what you love—berries, kiwi, passionfruit, or even pomegranate seeds add a festive color and beautiful flavor contrast. I’ve also replaced the vanilla bean paste in the whipped cream with a splash of orange or lemon zest for a citrus twist that brightens the overall flavor.
For those with dietary restrictions, this recipe is naturally gluten-free as it uses no flour, which makes it easy to serve to guests with celiac disease or gluten sensitivity. If you want to make it vegan, I recommend experimenting with aquafaba (chickpea water) as an egg white substitute to whip the meringue, and using coconut cream instead of dairy cream for a similar richness. While the texture will vary slightly, it can still produce a delightful pavlova wreath.
I’ve occasionally tried baking it in individual smaller rings to create personal pavlova wreaths for each guest, which looks adorable and makes serving easier at parties. Just remember to adjust baking times accordingly, as smaller pavlovas cook faster.
Storage and Reheating
Storing Leftovers
Because of the crisp texture of the meringue, I recommend storing any leftover pavlova wreath in an airtight container at room temperature, ideally in a single layer to prevent breakage. It’s best eaten within 1 to 2 days for the freshest texture since meringue tends to soften over time as it absorbs moisture from the air and cream.
Freezing
Freezing this pavlova wreath is not ideal because the meringue will lose its crispness and become chewy when thawed. If you’re set on freezing, I suggest freezing only the baked meringue base without cream or fruit, wrapped tightly in plastic wrap and stored in an airtight container. This way, you can thaw it at room temperature and add fresh whipped cream and fruit just before serving.
Reheating
I don’t recommend reheating pavlova as it is best enjoyed fresh or at room temperature. If your pavlova has softened slightly, you can pop it into a very low oven (around 100˚C) for a few minutes to dry it out a bit, but be careful not to melt the topping or burn it. Generally, serving immediately after assembling is the best way to enjoy the textures and flavors at their peak.
FAQs
Can I make the pavlova base ahead of time?
Absolutely! You can bake the meringue base up to a day in advance. Just store it in an airtight container at room temperature to keep it crisp. Add the cream and fruit just before serving for the best texture and freshness.
What types of fruit work best on the wreath?
I love using a combination of berries like strawberries, raspberries, and blueberries alongside sliced kiwi or passionfruit. These fruits provide a balance of sweet and tangy flavors and vibrant colors that really make the wreath pop. Feel free to use whatever is in season or your personal favorites!
How do I know when the meringue is done baking?
The meringue should be crisp on the outside, dry to the touch, and slightly golden. It may sound hollow when you tap it gently. It’s okay if it still feels a bit soft inside because the cornflour and vinegar mixture keeps the interior marshmallowy rather than wet or raw.
Can I use regular vinegar instead of white wine vinegar?
Yes, you can substitute white wine vinegar with regular distilled vinegar if needed. The amount is small, so it won’t affect the flavor too much, but white wine vinegar tends to be milder and less acidic, which is why I prefer it.
What if I don’t have vanilla bean paste?
No worries! You can use vanilla extract as a substitute—about half the quantity works well since it’s more concentrated. I love the specks and flavor of vanilla bean paste, but good-quality extract can achieve a similar warm vanilla note in the cream.
Conclusion
I can’t recommend this Holiday Pavlova Wreath Recipe enough for adding a touch of elegance and festive cheer to your dessert table. It’s a recipe that feels special but is actually quite simple to make, and the stunning result always draws smiles and compliments. I hope you enjoy making and sharing this pavlova as much as I do—it truly is a joyful way to celebrate the holiday season with friends and family.
PrintHoliday Pavlova Wreath Recipe
This festive Holiday Pavlova Wreath is a stunning dessert featuring a crisp meringue base topped with whipped cream and fresh fruit. Perfect for celebrations, it combines a light, airy texture with rich creaminess and vibrant fruit flavors, decorated with mint leaves and a dusting of icing sugar for a beautiful presentation.
- Prep Time: 30 minutes
- Cook Time: 1 hour 15 minutes
- Total Time: 1 hour 45 minutes
- Yield: 16 servings
- Category: Dessert
- Method: Baking
- Cuisine: Western
- Diet: Vegetarian
Ingredients
Meringue
- 6 large egg whites
- 350g caster sugar
- 1 tsp white wine vinegar
- 1 tsp cornflour
Topping
- 600ml (20fl oz) double cream
- 5ml (1 tsp) vanilla bean paste
- 700g (1½lb) fruit of your choice
- Mint leaves, to decorate
- Icing sugar, for dusting
Instructions
- Preheat Oven: Preheat your oven to 160˚C (fan 140˚C) / 320˚F / gas mark 3 to prepare for baking the meringue base.
- Prepare Baking Sheet: Line a baking sheet with baking parchment and draw a 30cm circle on the paper, then draw a smaller 15cm circle in the center to guide the shape of the pavlova wreath.
- Whisk Egg Whites: Place the egg whites into the bowl of a stand mixer with a whisk attachment. Whisk until soft peaks form, indicating that the egg whites have enough volume.
- Add Sugar Gradually: Add the caster sugar little by little while whisking on maximum speed until the mixture is stiff, glossy, and smooth, which ensures stability and sweetness.
- Incorporate Cornflour and Vinegar: Mix cornflour and white wine vinegar in a small cup to form a slurry, then gently fold this into the meringue mixture to help stabilize it.
- Shape the Meringue: Spoon the meringue onto the drawn ring on the parchment paper, carefully flattening the mixture to create an even surface for the cream and fruit topping. Remember the meringue will spread slightly during baking.
- Bake the Meringue: Place the meringue in the oven, immediately reducing the temperature to 140˚C (fan 120˚C) / 280˚F / gas mark 1. Bake for 1 hour to 1 hour and 15 minutes. After baking, leave it in the oven to dry out for at least one hour or overnight if possible.
- Whip the Cream: Whip the double cream with vanilla bean paste until barely stiff peaks form, ensuring the cream is soft enough to complement the crisp meringue.
- Assemble the Pavlova: Spoon the whipped cream onto the cooled meringue base and arrange your choice of fresh fruit on top for a colorful and festive look.
- Garnish and Serve: Decorate with fresh mint leaves and dust lightly with icing sugar to finish the pavlova wreath attractively before serving.
Notes
- The meringue must be baked at a low temperature and dried out well to achieve a crisp exterior with a soft inside.
- Use fresh, high-quality fruit such as berries, kiwi, passion fruit, or stone fruits for the best flavor and appearance.
- Ensure egg whites are at room temperature before whisking to maximize volume.
- This pavlova is best assembled just before serving to avoid the meringue becoming soggy.
- You can prepare the meringue a day ahead and store it in an airtight container.


Leave a Reply