
I absolutely love sharing this Mini Cheesecakes with Graham Cracker Crust Recipe because it’s such a delightful little treat that always earns compliments. I find these mini cheesecakes incredibly satisfying with their creamy, dreamy filling sitting atop a perfectly buttery, slightly crunchy graham cracker crust. They’re just the right size to indulge my sweet tooth without feeling heavy, and they’re wonderful for serving at any occasion where you want to impress but keep things simple and approachable.
Why You'll Love This Mini Cheesecakes with Graham Cracker Crust Recipe
One of the reasons I adore this Mini Cheesecakes with Graham Cracker Crust Recipe is the balance of flavors and textures. The crust provides a subtle crunch and a lovely, slightly sweet base that perfectly complements the rich, smooth cream cheese filling. That touch of tanginess from the lemon juice and sour cream brightens the entire dessert, making each bite feel fresh and luxurious. Every time I make these, I’m reminded why classic flavor combinations like cream cheese and graham cracker crust never go out of style.
Another thing that keeps me coming back to this recipe is how straightforward it is to prepare. I love that the ingredients are simple and pantry-friendly, yet the result looks and tastes like a bakery-quality dessert. Plus, the mini size makes them perfect for sharing at parties, holidays, or even casual weeknight dinners when I want to end on a sweet note. What really makes this recipe stand out is the clever water bath technique I use—it keeps the cheesecakes perfectly creamy without cracking or sinking too much. It’s those little details that make a big difference and keep me recommending this recipe to friends and family.
Ingredients You'll Need
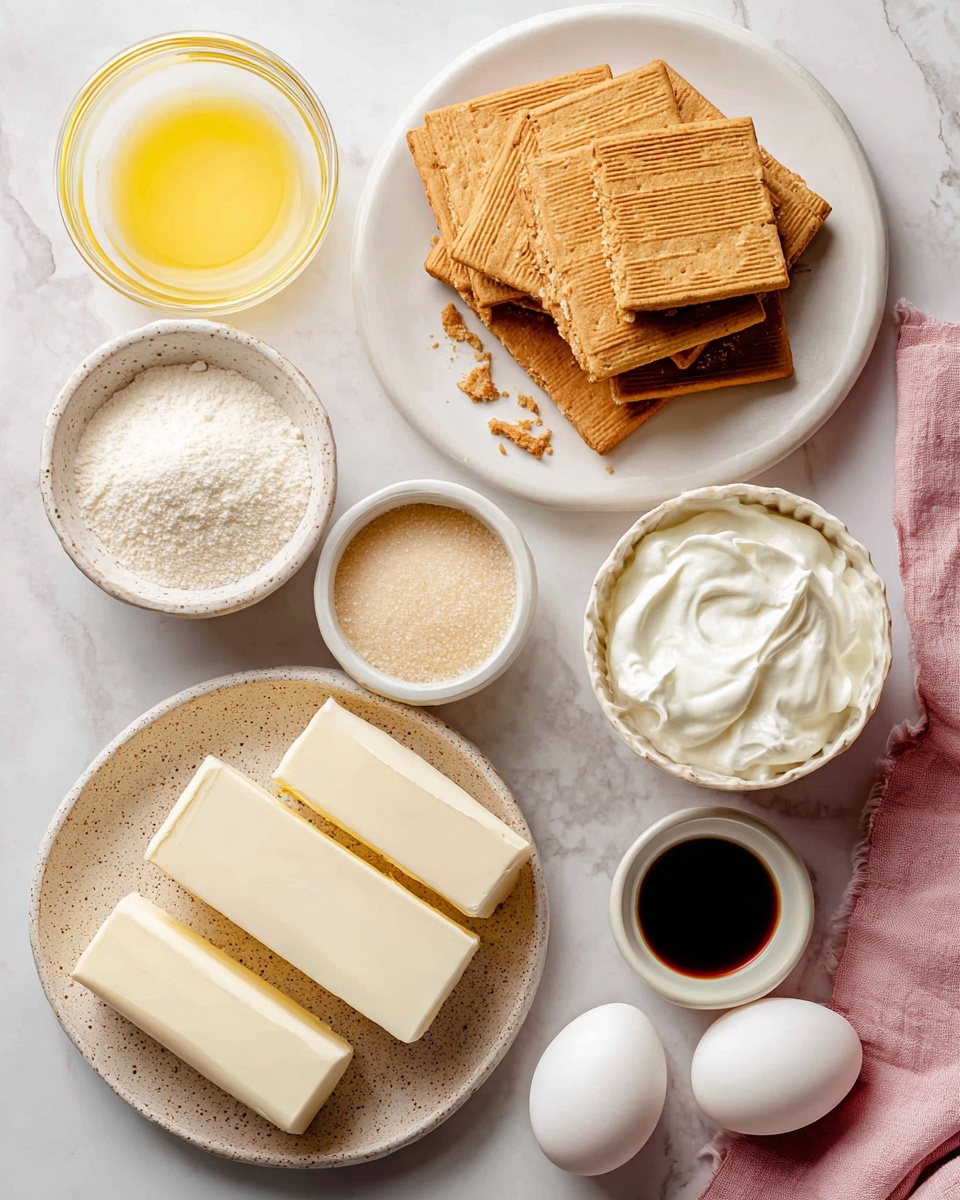
These ingredients are straightforward and easy to find, but each plays a crucial role in creating the perfect mini cheesecake. From the graham cracker crumbs that provide the ideal crust texture to the fresh cream cheese and eggs that create the rich, velvety filling, every element contributes to the mouthwatering taste, smooth texture, and attractive appearance of the final dessert.
- Graham cracker crumbs: These form the crunchy, buttery base that balances the creamy filling perfectly.
- Granulated sugar: Adds the perfect amount of sweetness to both crust and filling without overpowering.
- Unsalted butter: Melts into the crust, binding the crumbs and delivering richness in every bite.
- Full-fat cream cheese: The star of the filling, it creates that classic, silky cheesecake texture.
- Full-fat sour cream: Gives a subtle tanginess and keeps the cheesecake moist and tender.
- Pure vanilla extract: Adds warmth and depth to the filling’s flavor.
- Freshly squeezed lemon juice: Brightens the cheesecake and balances richness with a touch of citrus.
- Large eggs: Provide the structure and help the filling set just right without becoming cakey.
Directions
Step 1: Preheat your oven to 350°F (177°C), and line a standard 12-count muffin pan with cupcake liners to make cleanup easier and to help form neat portions.
Step 2: Prepare the crust by combining graham cracker crumbs, granulated sugar, and melted butter in a medium bowl until the mixture is sandy and well combined.
Step 3: Firmly press about a heaping tablespoon of the crust mixture into each cupcake liner, making sure to compact it to create a sturdy base. Bake the crusts for 6 minutes to set them perfectly.
Step 4: Meanwhile, make the filling. Beat the softened cream cheese and granulated sugar together on medium-high speed for about 2 minutes, until completely smooth and creamy.
Step 5: Add the sour cream, lemon juice, and vanilla extract to the mixture, beating until combined. Then, with the mixer running on medium speed, add eggs one at a time, mixing just until incorporated after each addition—avoid over-mixing to keep the texture silky.
Step 6: Divide the cheesecake batter evenly among the liners, filling each all the way to the top. It’s fine if the crusts feel warm.
Step 7: For an extra smooth finish, I like to use a water bath. Boil water and pour about one inch into a large metal roasting pan placed on the oven’s bottom rack, then place the muffin pan with cheesecakes on the center rack. This steams the oven environment gently without submerging the pan and reduces cracking or sinking.
Step 8: Bake for around 20 minutes until the edges are set but the centers still jiggle slightly when the pan is gently tapped.
Step 9: Remove the pan and place it on a cooling rack. Let the cheesecakes cool at room temperature for about 45 minutes, then refrigerate for at least 2 hours (or up to 24). If you're short on time, freezing for 1 hour speeds up the process.
Step 10: Once chilled, decorate as you like. I love piping whipped cream on top with a classic star tip and adding fresh berries or a sprig of mint for that extra wow factor.
Step 11: Store any leftovers covered in the refrigerator for up to 5 days to keep them fresh.
Servings and Timing
This recipe yields 12 delicious mini cheesecakes, perfect for sharing with family and friends. The prep time is about 20 minutes, mostly spent mixing and pressing the crust. Baking time clocks in at roughly 20 minutes, but don’t forget the cooling and chilling phase, which takes around 3 hours in total—this is essential for achieving that perfect creamy texture. If you want to enjoy them sooner, an hour in the freezer does the trick to speed things up, but I highly recommend the longer chill for optimal flavor development.
How to Serve This Mini Cheesecakes with Graham Cracker Crust Recipe
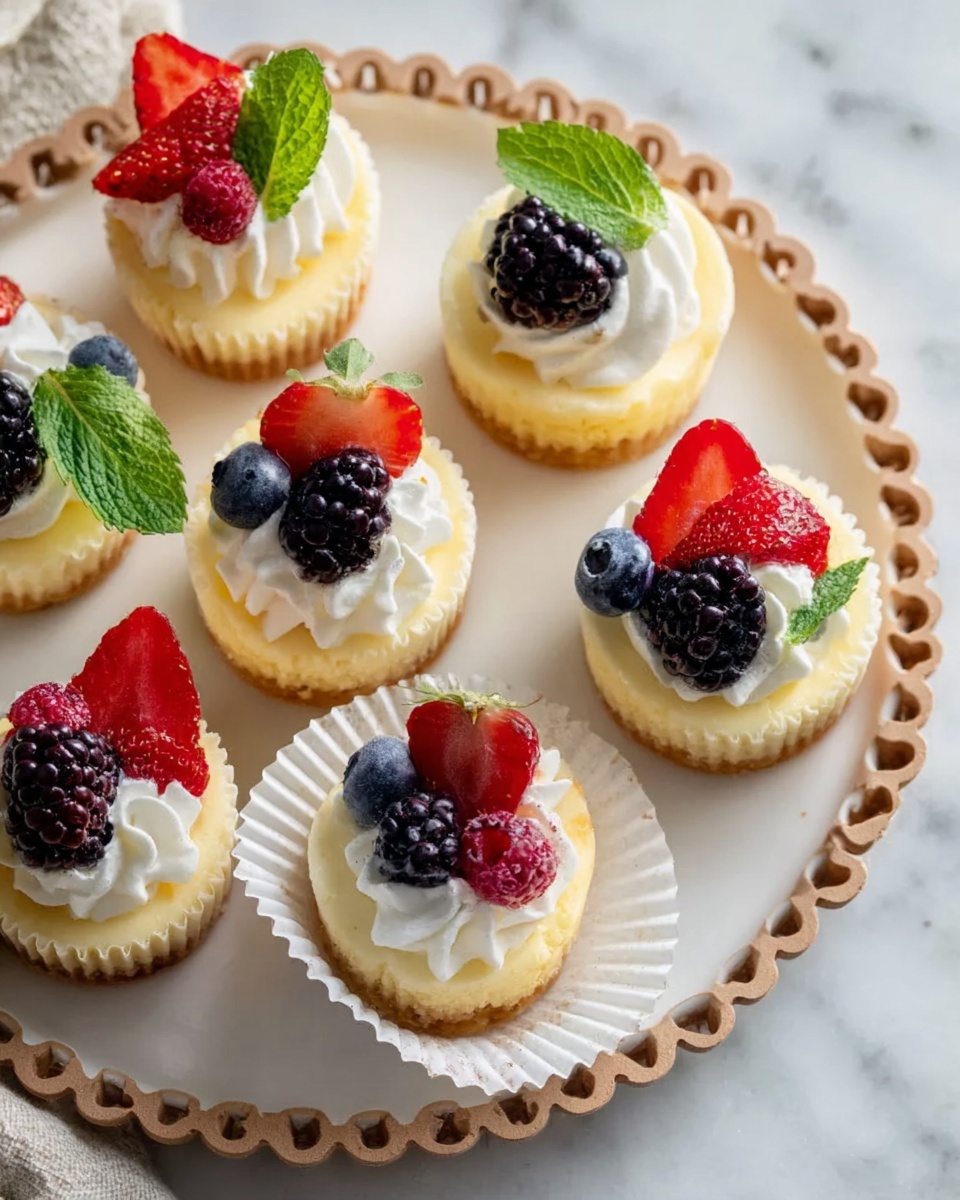
When it comes to serving these mini cheesecakes, I love to keep things simple but elegant. They’re fantastic served chilled straight from the fridge, allowing the creamy texture to shine. I often garnish them with a dollop of lightly sweetened whipped cream and fresh berries like raspberries or blueberries for a pop of color and fresh flavor. A sprig of mint adds that finishing touch to brighten the presentation.
For a fun twist at gatherings, I sometimes set out a toppings bar with an assortment of sauces and fruits like strawberry compote, caramel drizzle, or chopped nuts so guests can personalize their mini cheesecakes. These little desserts also go wonderfully with a cup of strong coffee or a glass of dessert wine like Moscato or late-harvest Riesling, which complements the creamy richness beautifully.
I find these mini cheesecakes make an excellent centerpiece for holidays, dinner parties, or even casual weekend treats. Serving them on small dessert plates or in cupcake wrappers keeps portions manageable and gives a charming, homely vibe. Their size makes them guilt-free and easy to enjoy without leftovers looming too large!
Variations
Over time I’ve experimented with different ways to customize this Mini Cheesecakes with Graham Cracker Crust Recipe to suit various tastes and dietary needs. For a gluten-free version, I substitute the graham cracker crumbs with gluten-free cookie crumbs or almond meal. It’s an easy switch that still delivers a crunchy, buttery crust without compromising flavor.
If you’re into flavor variations, mixing in a swirl of chocolate ganache or crushed peppermint candy into the filling adds a festive twist that’s perfect for special occasions. Another favorite of mine is adding a touch of cinnamon or pumpkin pie spice to the crust during cooler months, which adds a cozy warmth to every bite.
For those interested in a vegan version, swapping the cream cheese for a dairy-free alternative made from cashews or coconut works well, although the texture will be slightly different but still delicious. Baking time and chills might vary, so watch carefully and give it extra time to set. You can also try baking these mini cheesecakes in a water bath as described or experiment with steaming them for an even softer texture.
Storage and Reheating
Storing Leftovers
I always store leftover mini cheesecakes in an airtight container or cover the muffin pan tightly with plastic wrap and then foil. Keeping them refrigerated is essential to maintain their creamy texture and freshness, and they typically stay great for up to 5 days. If you plan to keep them longer than that, freezing is your best bet.
Freezing
This Mini Cheesecakes with Graham Cracker Crust Recipe freezes beautifully. I recommend placing the chilled cheesecakes on a baking sheet and freezing until firm (about an hour) before transferring to a freezer-safe container or zip-top bag. This prevents them from sticking together. Frozen mini cheesecakes can be kept for up to 1 month and make a wonderful make-ahead dessert option when you’re prepping for a party or holiday.
Reheating
Since these are best enjoyed chilled, I usually just let frozen cheesecakes thaw overnight in the refrigerator. Avoid reheating in a microwave because it can ruin the texture and cause separation. If you want to serve them at room temperature, simply remove them from the fridge about 15-20 minutes before serving so they soften slightly and their flavors open up beautifully.
FAQs
Can I use low-fat cream cheese in this Mini Cheesecakes with Graham Cracker Crust Recipe?
While low-fat cream cheese can be used, it will affect the richness and creaminess of the cheesecakes. I find full-fat cream cheese gives the best texture and flavor, so I recommend using it whenever possible for that classic luscious mouthfeel.
Do I have to use the water bath method?
The water bath isn’t mandatory but highly recommended if you want a super creamy texture without cracking or excessive sinking. It creates a gentle baking environment with steam that helps the cheesecakes set evenly. If you skip it, just watch the baking time closely and allow proper cooling to minimize sinking.
Can I make these mini cheesecakes ahead of time?
Absolutely! These cheesecakes are perfect for making a day or two in advance. Just make sure to keep them refrigerated and decorated shortly before serving for the best freshness and appearance.
What’s the best way to prevent cheesecake from cracking?
Avoid over-mixing the eggs, bake at the right temperature, and incorporate the water bath technique. Also, letting the cheesecakes cool slowly at room temperature before chilling helps prevent cracks and results in a smooth, beautiful surface.
Can I add different toppings to these mini cheesecakes?
Definitely! These mini cheesecakes are a great canvas for all kinds of toppings, from fresh fruit, chocolate shavings, caramel or berry sauces to nuts or whipped cream. Get creative and customize them to your liking!
Conclusion
I hope this Mini Cheesecakes with Graham Cracker Crust Recipe inspires you to create a delightful dessert that's both easy and impressive. It holds a special place in my recipe collection because of its creamy texture, perfect sweetness, and the joy it brings whenever I share it. Whether you’re serving them at a party or enjoying a quiet night in, these mini cheesecakes are sure to become a new favorite for you and your loved ones. Give them a try—you won’t regret it!
PrintMini Cheesecakes with Graham Cracker Crust Recipe

These Mini Cheesecakes are creamy, rich, and perfectly portioned for a delightful dessert. With a buttery graham cracker crust and a smooth cream cheese filling enhanced by sour cream, vanilla, and lemon juice, they are baked to a delicate set with a slightly jiggle in the center for creaminess. The recipe includes an optional water bath technique to prevent cracking and sinking, ensures a tender texture, and can be garnished with whipped cream and fresh berries for an elegant finish.
- Prep Time: 20 minutes
- Cook Time: 26 minutes
- Total Time: 3 hours 15 minutes
- Yield: 12 mini cheesecakes
- Category: Dessert
- Method: Baking
- Cuisine: American
- Diet: Vegetarian
Ingredients
Crust
- 1 cup (120g) graham cracker crumbs (about 8 full sheet graham crackers)
- 2 Tablespoons (25g) granulated sugar
- 3 Tablespoons (43g) unsalted butter, melted
Filling
- 16 ounces (452g) full-fat brick cream cheese, softened to room temperature
- ½ cup (100g) granulated sugar
- ¼ cup (60g) full-fat sour cream, at room temperature
- 1 teaspoon pure vanilla extract
- 1 teaspoon freshly squeezed lemon juice
- 2 large eggs, at room temperature
Toppings (optional)
- Whipped cream (piped or spread)
- Fresh berries
- Mint leaves
Instructions
- Preheat oven and prepare pans: Preheat your oven to 350°F (177°C) and line a standard 12-count muffin pan with cupcake liners to make the mini cheesecake shells.
- Make the crust: In a medium bowl, combine graham cracker crumbs, sugar, and melted butter until sandy. Firmly press about a heaping tablespoon of this mixture into each liner to form the crust base. Bake the crusts for 6 minutes to set.
- Prepare the filling: Using a handheld or stand mixer fitted with a paddle or whisk attachment, beat the cream cheese and sugar together on medium-high speed until smooth and creamy, about 2 minutes. Add sour cream, lemon juice, and vanilla extract, mixing until fully incorporated. With the mixer on medium, add eggs one at a time, mixing just until combined without overbeating to maintain a smooth texture.
- Fill the crusts: Divide the batter evenly among the prepared liners, filling each to the top. It is fine if the crust is still warm from baking.
- Optional water bath setup: Boil enough water to have 1 inch of water in a large metal roasting or baking pan (around 9×13 inches). Place this pan on the bottom rack of the oven and pour in the boiling water to create steam. Immediately place the cheesecakes on the center rack to bake.
- Bake the cheesecakes: Bake until the edges are set but centers still slightly jiggle when you tap the pan, about 20 minutes. The steam from the water bath prevents cracking and sinking of the cheesecakes.
- Cool the cheesecakes: Set the pan on a cooling rack and allow the cheesecakes to cool at room temperature for 45 minutes. Then transfer to the refrigerator to chill for at least 2 hours or up to 24 hours. To speed cooling, place in the freezer for 1 hour. If chilling longer than 2 hours, loosely cover the cheesecakes.
- Decorate and serve: Pipe or spread whipped cream on the mini cheesecakes using a Wilton 1M tip or any preferred method. Garnish with fresh berries, mint, or other desired toppings. Whipped cream decoration can be prepared up to 24 hours ahead.
- Storage: Cover and store leftover cheesecakes in the refrigerator for up to 5 days to maintain freshness.
Notes
- The optional water bath helps prevent sinking and cracking by adding steam without submerging the pan.
- Using room temperature ingredients ensures smooth mixing and better texture.
- Do not overmix the filling after adding eggs to avoid incorporating too much air, which can cause cracks.
- Whipped cream and garnishes can be prepared in advance to save time during serving.
- You can substitute fresh fruit toppings like strawberries, blueberries, or raspberries as desired.
- If you want a quicker chill, freeze the mini cheesecakes for 1 hour instead of refrigerating for 2 hours.



Leave a Reply