
I absolutely love sharing this Ninja Creami Vanilla Protein Ice Cream Recipe because it perfectly combines creamy vanilla goodness with a boost of protein, making dessert both satisfying and smart. It’s my go-to when I want something sweet but also nourishing, and thanks to the Ninja Creami, the texture is unbelievably smooth and dreamy every single time. Whether you’re watching your macros, craving ice cream, or just in need of a special treat, this recipe feels like the perfect little indulgence without the guilt.
Why You'll Love This Ninja Creami Vanilla Protein Ice Cream Recipe
What makes this Ninja Creami Vanilla Protein Ice Cream Recipe stand out to me is how beautifully balanced the flavor is. The vanilla protein powder adds a gentle but rich sweetness that isn’t overpowering, and the pudding mix creates this luscious creaminess that I find absolutely irresistible. It’s not your average protein shake frozen into a block—instead, it’s silky, velvety, and just melts in your mouth. Every bite reminds me why vanilla is such a classic, versatile flavor that can feel both comforting and refreshing.
I also love how simple it is to prep. You just blend a few ingredients, pop the mixture into the freezer, and let the Ninja Creami work its magic after 12 hours or so. It’s perfect when you want to plan ahead for a sweet snack or dessert, and the ease means I rarely get intimidated by making homemade ice cream. Plus, it’s great for so many occasions—weeknight treats, post-workout desserts, or even serving to friends who appreciate something unique yet familiar. The healthy twist with protein makes it feel like a little reward that also supports my fitness goals.
Ingredients You'll Need

Before you start, know that the ingredients for this ice cream are simple but thoughtfully chosen to give the perfect flavor, texture, and nutritional kick. Each component plays a special role in making the ice cream creamy, flavorful, and indulgent without overcomplicating the process.
- 2% Fairlife milk: Provides a creamy base with additional protein, making the ice cream rich but smooth.
- Plain unsweetened almond milk: Adds lightness and a subtle nuttiness to balance the dairy's richness.
- Vanilla protein powder: Offers sweetness and a protein boost, with natural vanilla flavor that sets the tone.
- Sugar-free vanilla Jello pudding mix: Enhances creaminess and adds a custard-like texture that I adore in ice cream.
- Liquid stevia: Sweetens gently without calories, adjustable to your preferred sweetness level.
Directions
Step 1: Add all the base ingredients—Fairlife milk, almond milk, vanilla protein powder, pudding mix, and liquid stevia—into an empty Ninja Creami pint container. Use an immersion blender to thoroughly combine the mixture until it’s smooth and no lumps remain. You can also do this in a regular blender or food processor if you prefer.
Step 2: Place the pint in the freezer and let it freeze for at least 12 hours, though 24 hours is okay too if you want to prepare it ahead of time. Make sure it freezes flat so the texture comes out uniform when you spin.
Step 3: Once frozen solid, remove the pint from the freezer. Run it briefly under warm water for about 30 seconds to loosen the edges—this helps the Ninja Creami blade spin smoothly.
Step 4: Install the pint in your Ninja Creami machine and select the Gelato cycle. This first spin breaks down the mixture and creates a creamy texture. When done, open it up and give the top a quick stir with a spoon to evenly mix any loose ice crystals.
Step 5: Spin the ice cream again, this time using the Lite Ice Cream cycle. This final spin perfects the texture, making it light and scoopable, exactly how I like it.
Step 6: Scoop the ice cream into a bowl, top it with your favorite toppings (I love crushed Oreos, Reese’s pieces, or a drizzle of chocolate sauce), and dig in right away!
Servings and Timing
This recipe yields a single serving of ice cream, perfect for a personal treat or snack. The prep time is minimal—about 10 minutes to blend and freeze the mixture. The freezing time ranges from 12 to 24 hours depending on your schedule, and the spinning process in the Ninja Creami only takes a few minutes. In total, you’re looking at roughly half a day to a full day including freezing, but the hands-on time is quick and easy, making it an ideal make-ahead dessert.
How to Serve This Ninja Creami Vanilla Protein Ice Cream Recipe
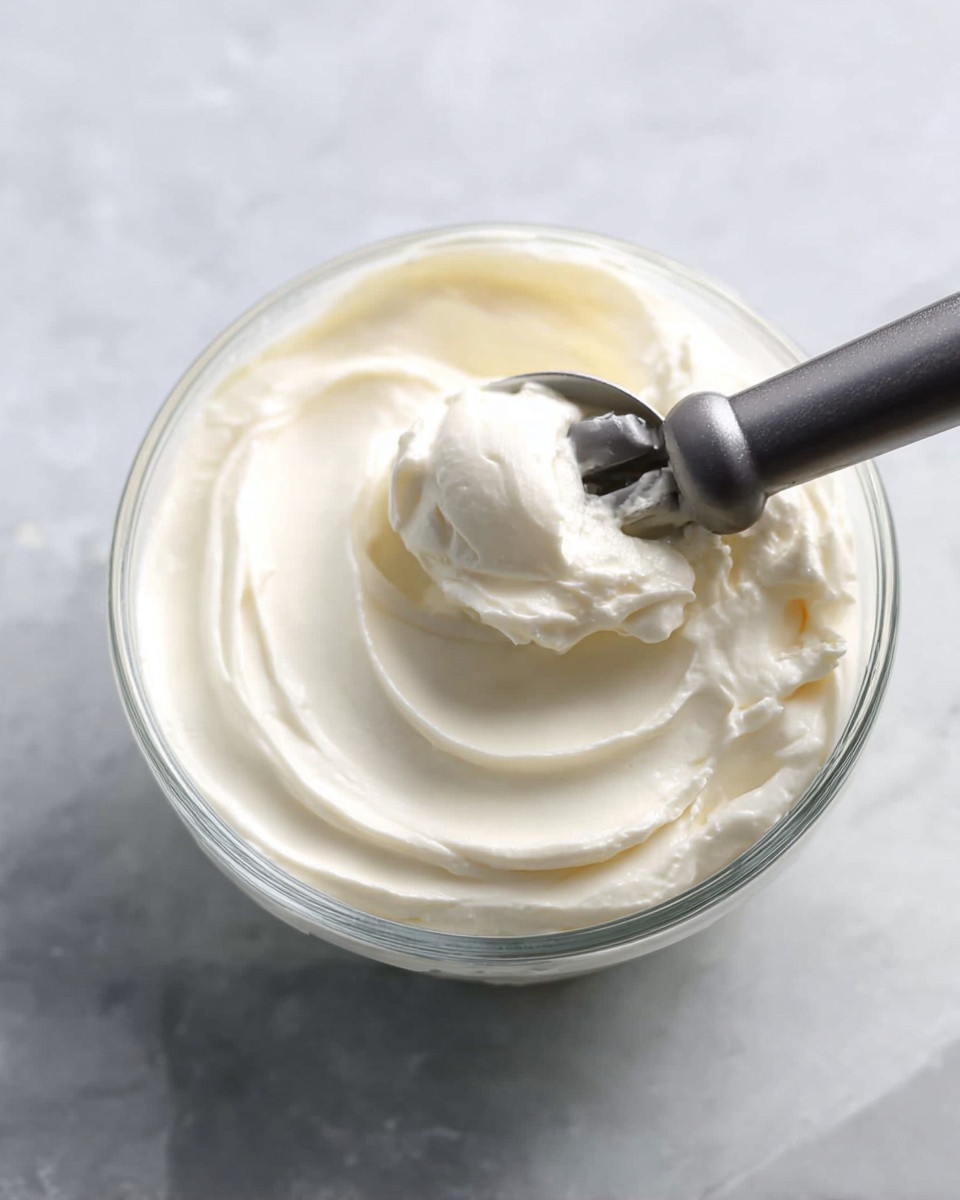
When I serve this Ninja Creami Vanilla Protein Ice Cream Recipe, I like to keep things simple but fun. It’s amazing on its own thanks to the rich vanilla flavor and creamy texture, but I also enjoy adding toppings that add a bit of crunch or extra sweetness—anything from fresh berries to a sprinkle of toasted nuts really livens it up. For a decadent touch, drizzle some sugar-free chocolate syrup or a spoonful of natural almond butter to pair beautifully with the vanilla base.
Presentation-wise, I love serving the ice cream in a clear glass bowl or pretty dessert cup to let the creamy vanilla color shine through. A small mint leaf or a few edible flowers on top can add that little wow factor if I’m hosting friends or family. This ice cream is perfect chilled straight from the Ninja Creami, so I always recommend serving it immediately for the best scoopable consistency and flavor experience.
For occasions, it’s such a versatile treat. I often enjoy it as a post-dinner dessert on weeknights when I want something sweet but refreshing, or during weekend gatherings when I know friends appreciate a clever twist on classic ice cream. Honestly, it’s the kind of recipe that fits so many moods and moments!
Variations
I love playing around with this Ninja Creami Vanilla Protein Ice Cream Recipe to keep it exciting. For example, if you don’t have vanilla protein powder on hand, you can substitute with your favorite flavor protein powder like chocolate or caramel for a different twist. You could also swap the almond milk with oat milk or coconut milk depending on your taste preferences or dietary needs.
If you’re vegan or dairy-free, adapting this recipe is totally doable. Use a plant-based protein powder and swap the 2% milk with a full-fat coconut milk to maintain the creamy texture. You might want to choose a dairy-free pudding mix or make a quick homemade vegan custard base to replicate that lush consistency.
For flavor variations, I sometimes add a splash of almond extract or a pinch of cinnamon to add warmth or depth to the vanilla base. Another fun idea is mixing in mini chocolate chips or swirls of natural peanut butter after the first spin cycle for a bit of texture and surprise in every spoonful.
Storage and Reheating
Storing Leftovers
If you have any leftovers, I recommend transferring the ice cream into an airtight container to keep it fresh and creamy. Smaller, shallow containers work best since less air helps prevent ice crystals from forming. Stored properly in the freezer, it’s best enjoyed within 3 to 5 days to maintain that silky texture.
Freezing
You can absolutely freeze any extra portions in airtight, freezer-safe containers. Make sure to press a piece of parchment paper directly on the surface of the ice cream before sealing to minimize freezer burn. Frozen this way, it will keep well for up to 2 weeks without significant quality loss, although fresher is always better.
Reheating
When you want to enjoy leftover Ninja Creami Vanilla Protein Ice Cream, I advise against reheating it like traditional food. Instead, let it sit at room temperature for about 5–10 minutes to soften naturally. If it’s too hard, a short spin in the Ninja Creami on the Lite Ice Cream cycle helps restore that perfect creamy texture beautifully without melting it away.
FAQs
Can I use other types of protein powder in this recipe?
Absolutely! While I usually use vanilla protein powder for the best flavor balance, you can substitute with whey, plant-based, or any flavored protein powder you like. Just keep in mind that some protein powders may alter the texture slightly, so you might need to experiment with sweetness and thickness.
Do I have to use the Ninja Creami machine, or can I make this without it?
The Ninja Creami is key for achieving that ultra-smooth, scoopable ice cream texture with this recipe. Without it, freezing the mixture will result in a harder, icy block that’s less creamy. However, you can try blending the frozen base in a high-speed blender and stirring vigorously to mimic the texture, but the results won’t be quite the same.
Is this recipe suitable for people with lactose intolerance?
If lactose intolerance is a concern, you can easily swap the dairy milk for lactose-free or plant-based milk options. Just be sure to choose a creamy alternative like full-fat coconut milk or unsweetened almond milk for the best texture. Also, double-check the protein powder and pudding mix ingredients to ensure they’re lactose-free.
Can I add mix-ins like chocolate chips or nuts?
Yes! I often add mix-ins after the Gelato spin cycle. Simply stir in mini chocolate chips, chopped nuts, or even small cookie pieces, then run the Lite Ice Cream cycle once more to distribute them evenly. It’s a great way to add extra flavor and texture to your ice cream.
How sweet is this ice cream, and can I adjust the sweetness?
The sweetness level is mild and adjustable depending on your taste and the type of protein powder or sweetener you use. I recommend starting with ¼ teaspoon of liquid stevia and tasting the base mixture before freezing. If you prefer it sweeter, you can add more stevia or another sweetener of choice before blending.
Conclusion
I hope you’re as excited as I am for you to try the Ninja Creami Vanilla Protein Ice Cream Recipe! It’s one of those rare recipes that combines simplicity, deliciousness, and a little healthy boost all in one. Whether you’re a protein lover, an ice cream enthusiast, or someone who just wants a treat that feels indulgent without the guilt, this recipe has something special to offer. Give it a try and let this creamy vanilla delight become your new favorite go-to dessert!
PrintNinja Creami Vanilla Protein Ice Cream Recipe

This Ninja Creami Vanilla Protein Ice Cream recipe is a delicious and healthy frozen treat made with a blend of 2% milk, unsweetened almond milk, vanilla protein powder, and sugar-free vanilla pudding mix. It delivers creamy, satisfying texture and rich vanilla flavor while being low in sugar and high in protein, perfect for a guilt-free dessert or post-workout snack. The recipe utilizes the Ninja Creami machine for easy and quick ice cream preparation at home.
- Prep Time: 10 minutes
- Cook Time: 12 hours (freezing time)
- Total Time: 12 hours 10 minutes
- Yield: 1 serving
- Category: Dessert
- Method: Blending
- Cuisine: American
- Diet: Low Fat
Ingredients
Base Ingredients
- 1 cup 2% Fairlife milk (240g)
- 1 cup plain unsweetened almond milk (240g)
- 2 Tbsp vanilla protein powder (15g)
- 1 Tbsp sugar-free vanilla Jello pudding mix (7g) (or regular)
- ¼ tsp liquid stevia (or sweetener of choice to taste)
Instructions
- Combine Ingredients: Add all the base ingredients into an empty Ninja Creami pint container. Use an immersion blender to blend until fully combined, or alternatively, mix them in a food processor or blender to achieve a smooth consistency.
- Freeze Ice Cream Base: Place the pint container in the freezer and let it freeze for 12 to 24 hours until solid to prepare for processing in the Ninja Creami machine.
- Process in Ninja Creami: Remove the frozen pint from the freezer. Run the top of the pint under warm water for a few minutes to loosen the ice cream. Insert the pint into the Ninja Creami machine and run the Gelato cycle once to create a creamy texture.
- Refine Texture: After the first cycle, give the ice cream a quick stir on top, then run the Lite Ice Cream cycle to further lighten and smooth the texture for perfect creaminess.
- Serve and Enjoy: Serve immediately with your favorite toppings such as crushed Oreos, Reese's pieces, sprinkles, or chocolate sauce, and enjoy your homemade vanilla protein ice cream.
Notes
- For best results, ensure the mixture is blended thoroughly before freezing to avoid icy texture.
- You can substitute the vanilla protein powder with any flavor of your choice to customize the ice cream.
- If you prefer a sweeter ice cream, adjust the stevia or sweetener amount to your taste.
- The freezing time can be extended up to 24 hours if needed to ensure the base is completely frozen before processing.
- This recipe is designed for single servings but can be multiplied for more portions.
- Use warm water carefully to prevent melting the ice cream base while loosening the pint container.


Leave a Reply